How to Compress a PDF Without Losing Quality (Free, 2026)
How to Compress a PDF Without Losing Quality
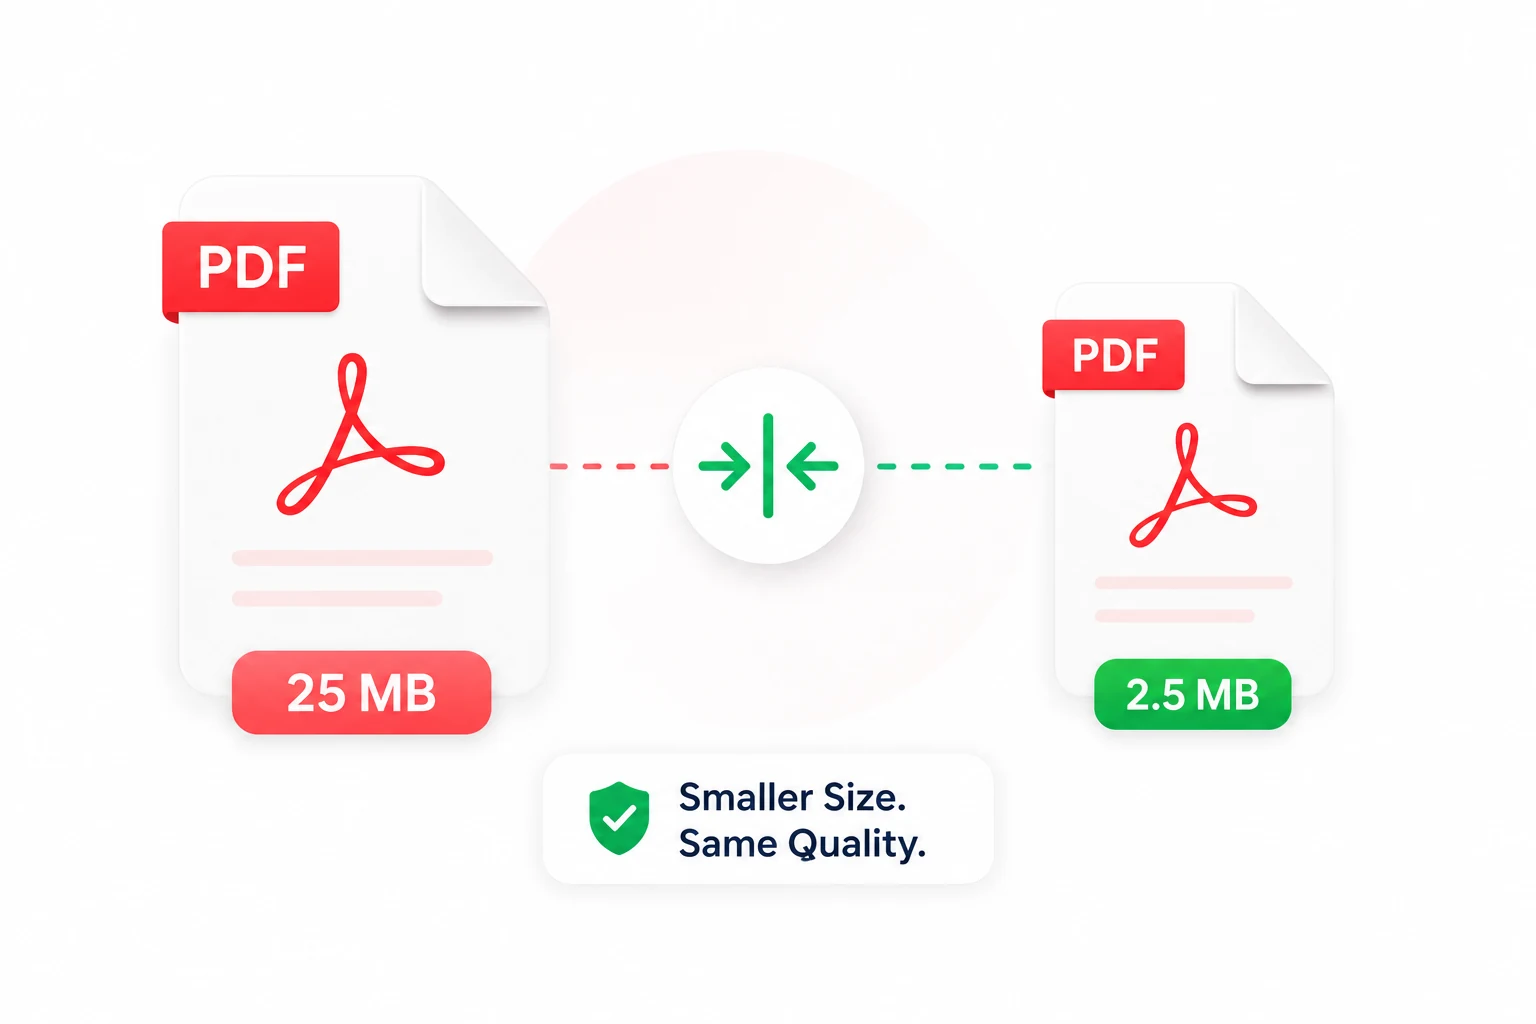
To compress a PDF without losing quality, shrink the images, not the text. Downsample embedded images to roughly 150 to 200 DPI and apply medium compression. Fonts, text, and vector graphics stay perfectly sharp because they are not images. Done this way, the file drops 40 to 70 percent while looking identical on screen. The fastest route is a free in-browser PDF compressor that never uploads your file.
That is the whole secret, and it explains why most "quality loss" people complain about is avoidable. A PDF is not one flat picture. It is a container holding separate layers: real text, embedded fonts, vector shapes, and raster images. Those layers compress very differently. When you reduce PDF file size the right way, you only touch the layer that is actually heavy, and the readable parts of your document come through untouched.
Why PDFs Get So Big in the First Place
If you have ever watched a five-page document balloon to 30MB, you already know PDFs do not behave intuitively. A page of plain text is tiny. A page with one photo can be enormous. Three things are almost always responsible.
High-resolution images. This is the number-one cause by a wide margin. A single full-page color photo at 300 DPI can add 8 to 10MB on its own, according to Adobe. Multiply that across a brochure or a photo-heavy report and the file size explodes. Worse, many images sit inside PDFs completely uncompressed, carrying far more pixel data than your screen can ever display.
Scanned pages. When you scan a document, each page becomes a high-resolution photograph, not text. Without OCR, your "text" file is really a stack of images. A color page scanned at 300 DPI commonly lands at 8 to 10MB, while the same page typed as actual text would be under 100KB. This is why scanned contracts and forms are the single most common reason people search for a way to make a PDF smaller.
Embedded fonts. PDFs embed fonts so the document looks the same everywhere. That is good for fidelity but costs space: each embedded font can add 400 to 600KB because it carries formatting data for every character in the typeface, not just the ones you used. A document using several font families can rack up a few megabytes from fonts alone.
There are smaller culprits too: high-resolution thumbnails, retained editing history, form fields, comments, and metadata. But if you fix the images, you fix 90 percent of the problem.
Lossless vs Lossy: The Distinction That Actually Matters
Every compression method falls into one of two camps, and understanding the difference is what lets you compress confidently instead of guessing.
Lossless compression removes redundant data and rebuilds the file exactly. Nothing is thrown away; decompress it and you get a byte-perfect original back. The catch is that the savings are modest, typically 10 to 30 percent for most documents. PDF compression is lossless by default for text, vectors, fonts, and metadata, which is exactly why those elements never degrade.
Lossy compression permanently discards data to achieve much larger reductions. It sounds destructive, and for text it would be. But good lossy algorithms are clever about what they remove. They target image detail your eye struggles to perceive at normal viewing size. This is the same principle that makes JPEG photos look fine despite being a fraction of their raw size.
The expert move is combining them: apply lossy compression to images and keep everything else lossless. Your photos shrink dramatically, your text stays crisp, and the document reads exactly as before. When a tool promises compression "without losing quality," this hybrid approach is what it should mean. A tool that flattens your whole document into one image and then compresses that is doing the opposite, and it will blur your text.
Realistic Size Targets: What You Are Actually Aiming For
Before you compress anything, know your target. Compressing harder than necessary throws away quality you did not need to lose. Here are the limits people genuinely hit.
Email attachments. Gmail caps attachments at 25MB to send; anything larger is automatically swapped for a Google Drive link. Outlook.com (free) is stricter at roughly 20MB, and many corporate mail servers set their own lower caps. One catch worth knowing: files grow by about 33 percent in transit due to encoding, so a 20MB file travels as roughly 27MB on the wire. The recipient's limit matters too. Emailing a Gmail user from Outlook means the effective ceiling is the smaller of the two. A safe, universal target for email is under 10MB, with under 5MB comfortable for almost any inbox.
Upload and application forms. This is where things get tight. Job portals, university admissions systems, and especially government websites enforce hard caps that flatly reject anything over the limit. The thresholds you will actually run into:
- Job application portals: usually 2MB to 5MB, so aim for under 2MB.
- University, visa, and admissions uploads: often 1MB to 2MB, so aim for under 1MB.
- Strict government forms: frequently 100KB to 500KB, with the notorious under 100KB cap still common.
These older systems were built when bandwidth was scarce, and they have never been relaxed. The takeaway: match your effort to the target. For email you can keep images at a comfortable 200 DPI. For a 100KB government form you will need every lever pulled, and probably fewer pages.
The Methods, Compared
There is no single "best" way to compress a PDF; the right choice depends on your device, your privacy needs, and how aggressive you need to be. Here is an honest comparison of the realistic options.
| Method | Platform | Best for | Quality impact |
|---|---|---|---|
| In-browser compressor | Any (web) | Quick, private, no install; sensitive files | Low, image-only |
| macOS Preview (Reduce File Size) | Mac | Built-in, no download needed | Medium to high; coarse control |
| Word / Print to PDF settings | Windows | PDFs you create from documents | Low to medium |
| Adobe Acrobat (PDF Optimizer) | Mac / Windows (paid) | Fine-grained control, batch work | Low; fully tunable |
| Pre-compress images first | Any | Photo-heavy reports built from scratch | Low; you control source |
A few notes on each, because the table only tells part of the story.
In-browser tools are the fastest path for most people. A good one loads in your browser, processes the file locally, and hands it back without ever transmitting it. That last part matters enormously for resumes, contracts, medical records, and tax forms. Our PDF compressor works this way: your document never leaves your machine, so there is no server holding a copy. If privacy is a concern, this is the option to reach for, and we go deeper on the topic in are online tools safe for file privacy.
macOS Preview has a built-in "Reduce File Size" filter, and it is genuinely convenient because it needs no download. Apple's own steps are: open the PDF, choose File then Export, pick "Reduce File Size" from the Quartz Filter menu, and click Save. One wrinkle on recent macOS versions: the default filter sometimes returns a file the same size as the original. The fix is to also check "Optimize images for screen" in the export options, or build a custom Quartz filter in ColorSync Utility for finer control. Preview is handy but blunt; you get one quality setting, not a dial.
Windows does not ship a dedicated PDF compressor, but you have two angles. If you are creating the PDF from Word, use Save As or Export rather than Print to PDF, then open Options and enable "Compress pictures" at 150 DPI. If you only have the finished PDF, re-printing it through Microsoft Print to PDF can sometimes shrink it, but results are unpredictable and it may degrade text. For reliable control on Windows, a browser-based tool is usually the better bet.
Adobe Acrobat (paid) offers the most granular control through its PDF Optimizer. You can downsample color and grayscale images to a chosen DPI, set JPEG quality, subset or unembed fonts, flatten transparency, and discard hidden objects and metadata independently. Adobe's own recommended starting point is downsampling color and grayscale images to around 150 DPI, monochrome to 300 DPI, with medium-to-high JPEG quality. If you compress PDFs constantly and need batch processing, it earns its cost. For a one-off form upload, it is overkill.
Pre-compressing images is the move for documents you build yourself. If you shrink and compress photos before placing them, using something like our image compressor, the resulting PDF is small from birth and there is nothing to fix later. This is the cleanest workflow when you control the source material.
How to Compress Without Any Visible Quality Loss
This is the part most guides skip. Here is the actual technique, the same logic a prepress professional uses.
Downsample to your viewing resolution, not below. Screens display around 72 to 96 PPI; standard print is 300 DPI. Almost nobody prints a PDF they downloaded from a form. Downsampling images to 150 DPI for screen, or 200 DPI if you want a print-safe buffer, is invisible to the eye at normal zoom but cuts file size by 40 to 70 percent. You would have to zoom past 200 percent on a high-resolution monitor to spot the difference between a 300 DPI and a 150 DPI image. So aim for 150 to 200 DPI unless you have a specific reason to print at high quality.
Compress the images, never the text. Real text stored as text takes almost no space and stays razor-sharp at any zoom. Leave it alone. Direct all compression at the images. This single principle is why "compress a PDF without losing quality" is a realistic promise rather than marketing.
Keep text as text; avoid flattening. Some tools "flatten" a PDF, rendering the whole page including text into one image and then compressing that image. The file shrinks, but now your crisp text is a blurry picture that pixelates when zoomed and can no longer be selected, searched, or copied. Avoid any tool or setting that flattens unless you have a deliberate reason. Keeping text as text is the difference between a clean document and a fuzzy one.
Convert color scans to grayscale when color is not needed. A scanned form rarely needs color. Switching a color scan to grayscale, or even black-and-white for pure text, can roughly halve the size before any other compression. For signed documents and printed forms, this is often the biggest single win.
Put together, the recipe is simple: 150 to 200 DPI images, medium JPEG compression, text untouched, no flattening, grayscale where color is pointless. That combination shrinks most documents by more than half with no difference a normal reader will ever notice.
How to Hit a Specific KB Target (100KB, 500KB, Under 2MB)
Strict upload forms are their own challenge because they demand an exact ceiling, not just "smaller." When compression alone will not get you there, you reduce what the PDF contains. Work through these in order.
1. Remove pages you do not need. This is the most overlooked step and often the most effective. If a form asks for page one of a five-page statement, do not compress all five. Use a split tool to keep only the page required. Dropping 80 percent of the pages drops most of the size instantly, and a single page is far easier to squeeze under 100KB.
2. Downsample images aggressively. For sub-1MB and 100KB targets, drop images to 100 to 150 DPI. At these sizes the document is almost certainly going to be viewed on screen, never printed, so the lower resolution costs you nothing in practice.
3. Convert to grayscale. As above, this roughly halves a color document. For the tightest targets it is often the step that finally gets you under the line.
4. Compress, then check, then repeat. Run the file through a compressor, check the resulting size, and if you are still over, raise the compression or cut another page. Hitting 100KB is iterative; the first pass rarely lands it exactly.
A reliable rule of thumb: a single-page text document compresses below 100KB with ease. A single-page color scan can usually reach 100KB after grayscale conversion and heavy downsampling. A multi-page scanned document at 100KB almost always requires splitting first, because there is a floor to how small a readable scanned page can get. If you are repeatedly fighting the size, the problem is usually page count, not compression strength.
When to Merge or Split Instead of Compress
Sometimes the size problem is really a structure problem. If you have ten separate compressed PDFs and the portal wants one upload, combine them with a merge tool rather than fighting each file individually; a single optimized file is often smaller than ten loose ones with duplicated fonts and metadata. Going the other direction, when only part of a document is needed, splitting and submitting just the relevant pages beats compressing the whole thing into oblivion. Reach for these before you crank compression to a level that finally does hurt quality.
A Note on Privacy
The documents people most often need to compress, resumes, signed contracts, bank statements, tax forms, medical records, are exactly the documents you should be most careful about uploading to a random website. Most online compressors send your file to a server. Reputable ones delete it later, but you are trusting a stranger's server with sensitive data, and breaches happen. In-browser tools that process everything locally sidestep the risk entirely: the file is compressed on your own device and never transmitted. For anything personal, that is the standard worth holding out for, and it is why our PDF compressor runs in the browser rather than on a server.
Putting It Together
Compressing a PDF without losing quality is not a trick; it is understanding that a PDF is layered and only the image layer is heavy. Downsample images to 150 to 200 DPI, apply medium compression, leave text as text, skip flattening, and switch needless color to grayscale. That alone shrinks most files by more than half with no visible difference. Know your target before you start, ease off when you have room, and for strict forms, cut pages before you cut quality. When you are ready, the free PDF compressor handles the image-only approach for you, entirely in your browser, so your document stays yours. And if your file is full of photos you control, compress them at the source first with the image compressor and you may never need to shrink the PDF at all.
Frequently asked questions
Target the images, not the text. Downsample embedded images to around 150 to 200 DPI and apply medium JPEG compression. Text, fonts, and vector graphics stay sharp because they are not images. At normal zoom the result looks identical to the original while the file shrinks 40 to 70 percent.
Heavy targets like 100KB usually need more than compression. First remove pages you do not need, then downsample images hard (around 100 to 150 DPI) and convert color scans to grayscale. A single-page text document compresses below 100KB easily; multi-page scans may need splitting first.
It depends on the tool. Most online compressors upload your file to a server you do not control, which is a real concern for resumes, contracts, and tax documents. In-browser tools that process files locally never transmit the document, so it stays on your device the entire time.
Lossless removes redundant data and rebuilds the file exactly, but only trims roughly 10 to 30 percent. Lossy permanently discards image detail your eye cannot easily perceive, which is how you get large reductions. The trick is applying lossy compression only to images while keeping text lossless.
Images are almost always the cause. One full-page color photo at 300 DPI can add 8 to 10MB on its own, and scanned pages are stored as photographs rather than text. Embedded fonts add 400 to 600KB each. Plain text PDFs are usually well under 100KB per page.
Not if you compress correctly. Real text stored as text is never downsampled, so it stays crisp at any zoom. Text only blurs when the page is a scanned image or when a tool flattens the document into a picture. Keep text as text and avoid flattening.
Share this article
Send it to a teammate or save the link for later.
Related tools
Related articles
Compress PDF: The Free Guide to Shrink Files for Email
Learn how to compress PDF for email quickly and free. Reduce size up to 99% to stay under attachment limits and protect privacy with a browser‑based tool.
Read articleIs the AI Bubble Bursting? Big Tech's $725B Reckoning
Is the AI bubble bursting in 2026? Big Tech is set to spend ~$725B on AI as the Magnificent 7 shed $2.3T — the bull and bear case, no hype, no advice.
Read articleApple Lost a Major EU Antitrust Fight: What It Means
Apple lost a major EU antitrust ruling on July 8, 2026, upholding DMA rules on the iPhone. What's decided, what's still pending, and what changes for you.
Read article